Getting Started - Hello, Cocoa!
The classic "Hello world!" program is more than just a tired introduction - it's one of the simplest possible programs that produce output. That makes it useful for testing your installation of the CamelBones framework. A more complicated program has a greater chance of having bugs of its own, making it difficult to be certain of the cause of any problems that crop up.
So, let's see if that copy of CamelBones you just installed is really working!
Xcode version
1. Create a project
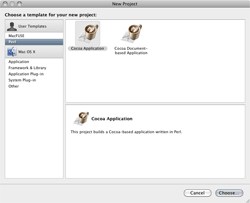
Begin by starting Xcode and creating your new project. In the "New Application" dialog box, choose "Cocoa Application" in the section "Perl" from the list of project types. After that, choose a name for your project ("Hello" would be a good choice for this one), and where you'd like to store the project files to finish the project creation.
2. Find and open the main window NIB
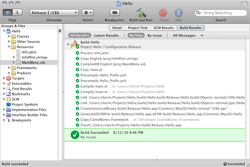
Expand the "Hello" item in the "Groups & Files" outline to the left by clicking on its disclosure triangle. Then select the "Resources" item under "Hello" by clicking once on it. Notice that selecting items in the outline affects the list of files that appear in the main part of the window - this can be a big help as more files are added to your project. Open "MainWindow.xib" in Interface Builder by double-clicking it, either in the list or the outline.
3. Add a text label to the main window
In Interface Builder, the Library panel has a drop-down menu at the top, named "Library" by default. Choose "Cocoa -> Views & Cells -> Inputs & Values on this menu. The list of controls below the drop-down will change, with Label controls appearing at the top of the list. Drag and drop a label onto the empty main window.
Double-click the text label in the main window to edit the text within it, and change the text to - wait for it - "Hello, Cocoa!" Or, change it to something else, if you're feeling particularly creative today. I won't be offended, I promise.
Be sure to save the changes you've made before switching back to Xcode.
4. Build and run your application
Build your application by clicking the "hammer" button in Xcode's tool bar. It may seem odd at first that you'd have to build your application - Perl is not, after all, a compiled language. But, your Perl code is stored in the application bundle as a resource, and the build process does more than just compile code - it also checks for modified resources that need to be copied into the application bundle.
Run your application by clicking the "Build and Run" button.


